Security researchers have sounded the alarm over ongoing attacks targeting over 1,000 publicly accessible CrushFTP servers. The attacks exploit a zero-day vulnerability that enables unauthenticated remote code execution (RCE), allowing attackers to hijack entire servers without credentials.
If you’re running an unpatched CrushFTP instance exposed to the internet, you may already be compromised.
The Vulnerability – CVE-2024-4040
The zero-day, now assigned CVE-2024-4040, affects multiple versions of CrushFTP, a widely-used commercial file transfer server for Windows, Linux, and macOS.
Exploiting this flaw allows a remote attacker to:
Access sensitive files (e.g., settings, sessions, or credentials)
Achieve remote code execution on the system
Fully hijack or persistently backdoor the server
Researchers warn that threat actors are actively exploiting this flaw in the wild.
Global Exposure
Security firm Shadowserver reports that more than 1,200 vulnerable CrushFTP servers remain exposed online, across:
US
Germany
Russia
Japan
France
And more…
This includes government agencies, corporations, and academic institutions.
🛡️ Fixes Are Available – Act Now
The CrushFTP team released patched versions (v10.7.1 and later). Admins are urged to:
Update immediately to the latest stable version
Review server logs for signs of unauthorized access
Isolate compromised systems from the network
Rotate credentials and tokens if exploitation is suspected
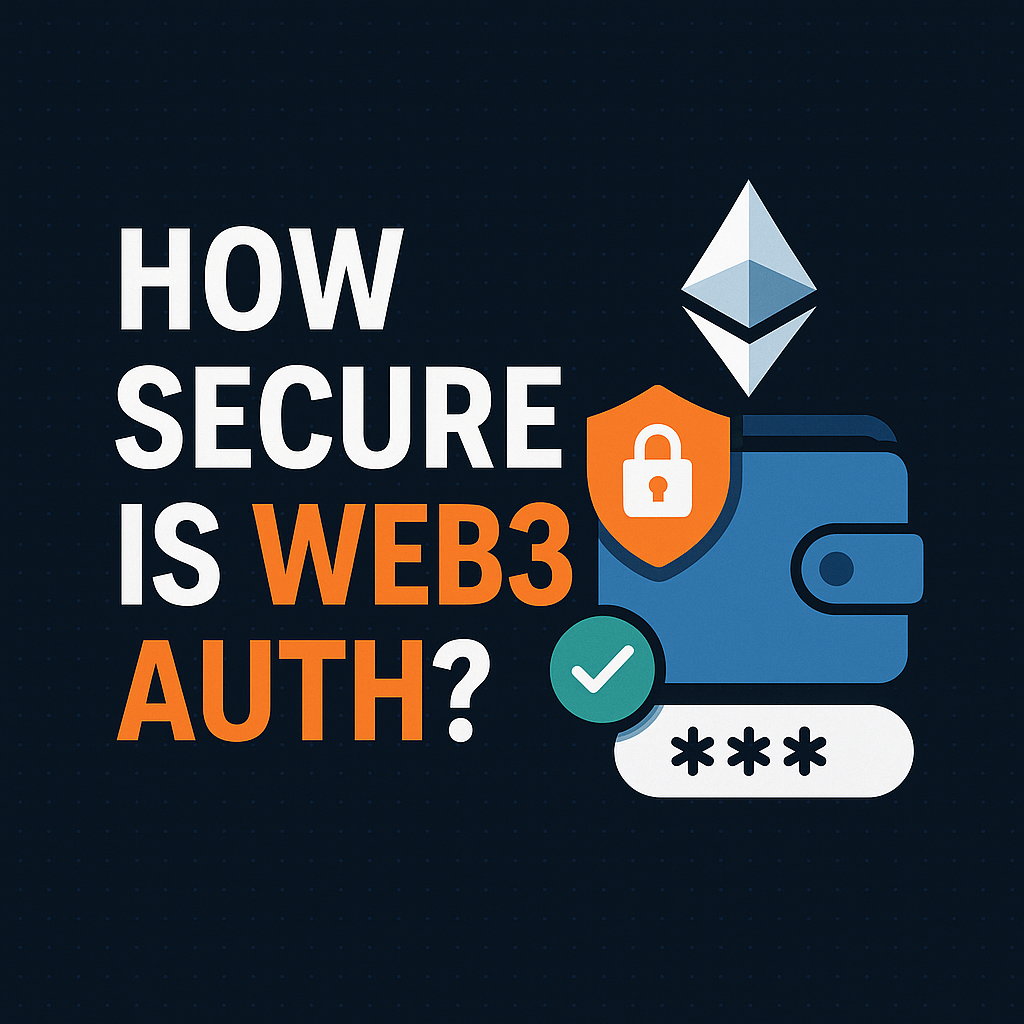
Web3 authentication, often dubbed “sign-in with wallet”, is being praised as the future of online identity. Instead of logging in with a password or even a federated login like Google or Facebook, Web3 Auth leverages blockchain wallets like MetaMask, Phantom, or WalletConnect-enabled apps to authenticate users.
But is it truly more secure? Or just a shiny new attack surface in disguise?
Let’s dig deep.
What Is Web3 Authentication?
At its core, Web3 Auth uses cryptographic signatures from a blockchain wallet to verify your identity. When a dApp (decentralized application) wants to log you in, it sends a challenge (usually a random string or nonce). You then sign this with your private key, proving that you own the wallet without revealing your key.
No passwords. No centralized databases.
It’s decentralized identity in action.
How It Works — Step-by-Step
You visit a dApp and click “Connect Wallet”.
The dApp asks your wallet to sign a message (a nonce).
Your wallet signs it using your private key.
The dApp verifies the signature using your public address.
If the signature checks out, you’re authenticated.
No registration required. Your wallet = identity.
🔒 Security Advantages
. No Passwords to Steal
There are no passwords stored anywhere. This kills off the risk of:
Phishing for passwords
Credential stuffing attacks
Database leaks
2. Ownership-based Access
Only the wallet owner can sign the challenge, so access is tied to private key control. It’s like using a digital signature on steroids.
3. Decentralized Authentication
There’s no central server holding user data. No OAuth tokens to intercept. No “Login with Facebook” server to go down.
. Anonymous or Pseudonymous Login
You can use a wallet with no personal info attached. This is a win for privacy-focused users.
⚠️ But Wait — There Are Risks
While Web3 Auth solves some old problems, it introduces new ones.
1. If You Lose Your Wallet, You’re Locked Out
There’s no “forgot password” link. If your seed phrase is gone, so is your identity — unless you’ve set up a recovery system (which most users haven’t).
2. Wallets Aren’t Immune to Phishing
Malicious Apps can trick users into signing dangerous messages:
Fake login messages
Transactions disguised as sign-in challenges
Permissions to drain funds
Signatures are powerful — and dangerous in the wrong hands.
. Lack of Granular Permissions
Most Web3 apps don’t yet support scopes or roles. It’s either full access or nothing. Compare that to OAuth scopes where you can allow read-only access, for example.
4. Poor UX for Non-Crypto Users
MetaMask pop-ups. Confusing messages. Long wallet addresses. For the average user, Web3 Auth can feel clunky and intimidating.
5. No Native Multi-Factor Authentication (MFA)
Unlike Web2 systems, where MFA is common, Web3 often relies on a single key pair — unless the user manually sets up a multisig wallet or smart contract-based auth.
Security Best Practices
If you’re building or using Web3 Auth, keep these in mind:
Use SIWE (Sign-In With Ethereum) or equivalent standards like CAIP-122 for Solana.
Validate the challenge properly. Make sure it’s a fresh nonce, and it expires quickly.
Don’t ask users to sign raw transactions unless necessary.
Add optional 2FA via email, hardware keys, or biometric plugins.
Integrate with DID (Decentralized Identity) frameworks for better interoperability and user control.
🌐 Real-World Use Cases
Use Case
Web3 Auth Role
NFT Marketplaces
Sign in with wallet to list or buy items
DAOs
Voting and identity tied to wallet
DeFi platforms
Authenticate before trading or staking
Gaming
Connect wallet for in-game assets
Token-Gated Content
Prove ownership to gain access
⚖️ Pros and Cons Summary
Pros
Cons
No passwords needed
Loss of wallet = loss of access
Decentralized, censorship-resistant auth
Still vulnerable to phishing
Better privacy and pseudonymity
No standard MFA or recovery for most users
Immutable identity tied to wallet
Risky for newcomers or non-technical users
Final Thoughts
Web3 authentication is a game-changer, especially for crypto-native platforms, but it’s not a silver bullet. Its strength lies in decentralization and cryptographic identity, but its weakness lies in usability, phishing risks, and lack of fallback mechanisms.
If you’re a user: treat wallet logins like root access — and sign carefully.
If you’re a developer: never skip nonce validation and educate your users.
Web3 Auth is powerful — but like all tools, it’s only as safe as the hands it’s in.
🇩🇪 Another European Region Ditches Microsoft: Linux Adoption Accelerates
Following Denmark’s recent move to transition its digital infrastructure to Linux and LibreOffice, a German federal state has now announced a similar plan — dropping Microsoft Windows and Office in favor of open-source alternatives. The shift is gaining momentum, and it’s starting to look like a growing European movement.
But what does this trend mean for the future of government IT, digital sovereignty, and cybersecurity?
A Growing Pattern Across Europe
First Denmark, now a German state — and this might just be the beginning. In the article published by PC för Alla, the German state has declared its intention to gradually move public institutions away from Microsoft products. The reasons are similar across the board:
Reducing dependence on foreign tech giants
Saving public money
Gaining control over software ecosystems
Ensuring long-term access and compatibility through open standards
Europe has long been debating digital sovereignty, especially as tensions rise globally over data protection and geopolitical control of tech infrastructure. Open-source software offers an escape from this vendor lock-in.
The Positive Outcomes
Economic Savings: No more massive license renewals for operating systems and productivity suites.
Customizability: Open-source allows tailoring to local needs — something large commercial vendors rarely provide.
Transparency: Anyone can audit the code, which is especially important for public institutions handling sensitive data.
Standardization Across Borders: If multiple EU countries use similar open-source stacks, it could lead to better interoperability and shared resources.
But Not Without Risk
Despite its advantages, the shift comes with challenges:
Learning Curve: Staff accustomed to Windows and Microsoft Office will need training and time to adapt.
Compatibility: Not all workflows or legacy systems migrate smoothly — especially in bureaucracy-heavy sectors.
Support Infrastructure: While Microsoft offers commercial support, governments must now rely on internal expertise or third-party support companies.
Security Target Shift: As mentioned in our earlier coverage of Denmark’s move — the more popular Linux becomes, the more attractive it becomes to attackers.
“Security through obscurity” is no longer an option. If Linux-based systems become the new standard in public administration, they must be secured with the same (or higher) rigor traditionally applied to Windows-based environments.
What the Future Might Hold
If this trend continues, we could see:
A cascade effect, with other regions and countries following suit
The development of new government-funded open-source distributions or tools
A more resilient, independent European digital landscape
But also, a potential rise in Linux-targeted malware, phishing campaigns, and zero-day exploits
Governments must prepare for both the benefits and the responsibilities that come with running an open-source infrastructure.
Final Thoughts
This isn’t just about software — it’s about sovereignty, transparency, and the future of public digital services. If properly managed, the move to Linux can empower governments and protect citizen data. But poor implementation or lack of preparation could lead to service disruptions, user frustration, and even new cyberattack vectors.
Europe is changing. The question is: will the rest of the world follow?
Discovered in mid-2025, Anubis is a ransomware variant that takes its name from the Egyptian god of the dead—and for good reason. Instead of merely holding files hostage, it executes them. After encrypting a victim’s files, the malware demands a ransom (usually in cryptocurrency), promising a decryption key upon payment. However, analysis has revealed that the malware has no functional decryption routine—once the files are encrypted, they are irreversibly overwritten or deleted.
Security researchers believe this behavior is intentional, likely designed to cause maximum disruption and psychological damage rather than financial gain.
Who Are the Targets?
Anubis doesn’t discriminate by industry, but critical infrastructure and healthcare institutions appear to be prime targets. Several reported attacks have involved:
Hospitals and clinics, resulting in data loss and halted medical operations.
Municipal networks, affecting emergency response and civic services.
Educational institutions, erasing research and administrative records.
SMBs (small and medium-sized businesses) lacking proper backups.
The choice of targets seems tactical—disrupting organizations where downtime equals danger.
Technical Behavior
While the full technical breakdown is still ongoing, researchers have observed the following behavior:
Payload Delivery: Via phishing emails, malicious attachments, or vulnerable exposed services (e.g. RDP, VPN).
Encryption: Files are encrypted with strong algorithms, but without saving decryption metadata.
Destruction: Files are deleted or corrupted even if ransom is paid.
Anti-Recovery: It wipes shadow copies, disables backups, and often attempts to overwrite files with garbage data before deletion.
Anubis also prevents boot in some cases, corrupting system partitions or disabling key services to paralyze the system further.
How to Protect Yourself
Given Anubis’ non-negotiable nature, prevention is the only real defense. Here are critical steps to minimize your risk:
1. Backups Are King
Maintain regular, offline, and offsite backups.
Test recovery procedures monthly.
Avoid mapping backup storage directly to production systems.
2. Patch and Harden
Keep systems, especially public-facing services, fully patched.
Disable unnecessary ports (like RDP) and use firewalls or VPNs to restrict remote access.
Harden configurations using CIS Benchmarks or similar guidelines.
3. Educate Your Team
Conduct regular phishing training.
Simulate attacks to build awareness.
4. Use EDR and Network Monitoring
Employ Endpoint Detection and Response (EDR) tools with behavioral detection.
Monitor traffic for unusual activity (e.g., outbound traffic spikes, command & control connections).
No. Not with Anubis. This is not a ransomware that unlocks your files post-payment—it destroys them. Paying only funds further destruction and emboldens attackers.
Instead, report the attack to national cybersecurity authorities (like CERT-SE in Sweden or CISA in the U.S.), preserve any evidence, and isolate infected systems immediately.
Final Thoughts
Anubis is not just another ransomware strain—it represents a shift in cybercriminal mindset from extortion to pure sabotage. It also underlines the critical importance of preparedness over reaction.
“Hope is not a strategy. Backups, segmentation, and proactive defense are.”
Organizations—especially those in healthcare and critical infrastructure—must now treat ransomware not just as a financial threat, but as a destructive force. With no key, no mercy, and no trust, Anubis lives up to its mythological namesake—ushering victims straight to the digital underwo
Privilege escalation (often shortened to priv-esc) is one of the most critical steps in an attack chain. It allows an attacker to gain higher privileges after compromising a low-level account — ultimately leading to root or SYSTEM access. In this article, we’ll explore how it works, real-world examples, and how to protect your systems.
Types of Privilege Escalation
Vertical: Gaining higher-level privileges (e.g., from user to root).
Horizontal: Gaining access to another user’s data or processes at the same privilege level.
Common Linux Techniques
Sudo misconfigurations: E.g., sudo vim → :!bash for root shell.
SUID binaries: Exploiting binaries like /usr/bin/python with setuid bit.
Kernel exploits: DirtyCow (CVE-2016-5195), OverlayFS, etc.
Writable /etc/passwd: Injecting a fake root user.
Common Windows Techniques
Unquoted service paths: Abuse poor service path handling.
AlwaysInstallElevated: MSI abuse to gain SYSTEM access.
Token impersonation: Tools like Juicy Potato or PrintSpoofer.
Tools for Enumeration
Linux: LinPEAS, LES.sh, pspy, GTFOBins
Windows: WinPEAS, Seatbelt, PowerUp.ps1
Defense Strategies
Enforce the Principle of Least Privilege (PoLP).
Audit sudoers and SUID binaries regularly.
Monitor for suspicious cron jobs and startup tasks.
Apply patches early to reduce kernel and service exploits.
Use Sysmon, auditd, and log management for detection.
Final Thoughts
Privilege escalation is powerful — and dangerous. Whether you’re a penetration tester or a system administrator, understanding both attack and defense is critical for keeping systems secure. Always think like an attacker… before they do.
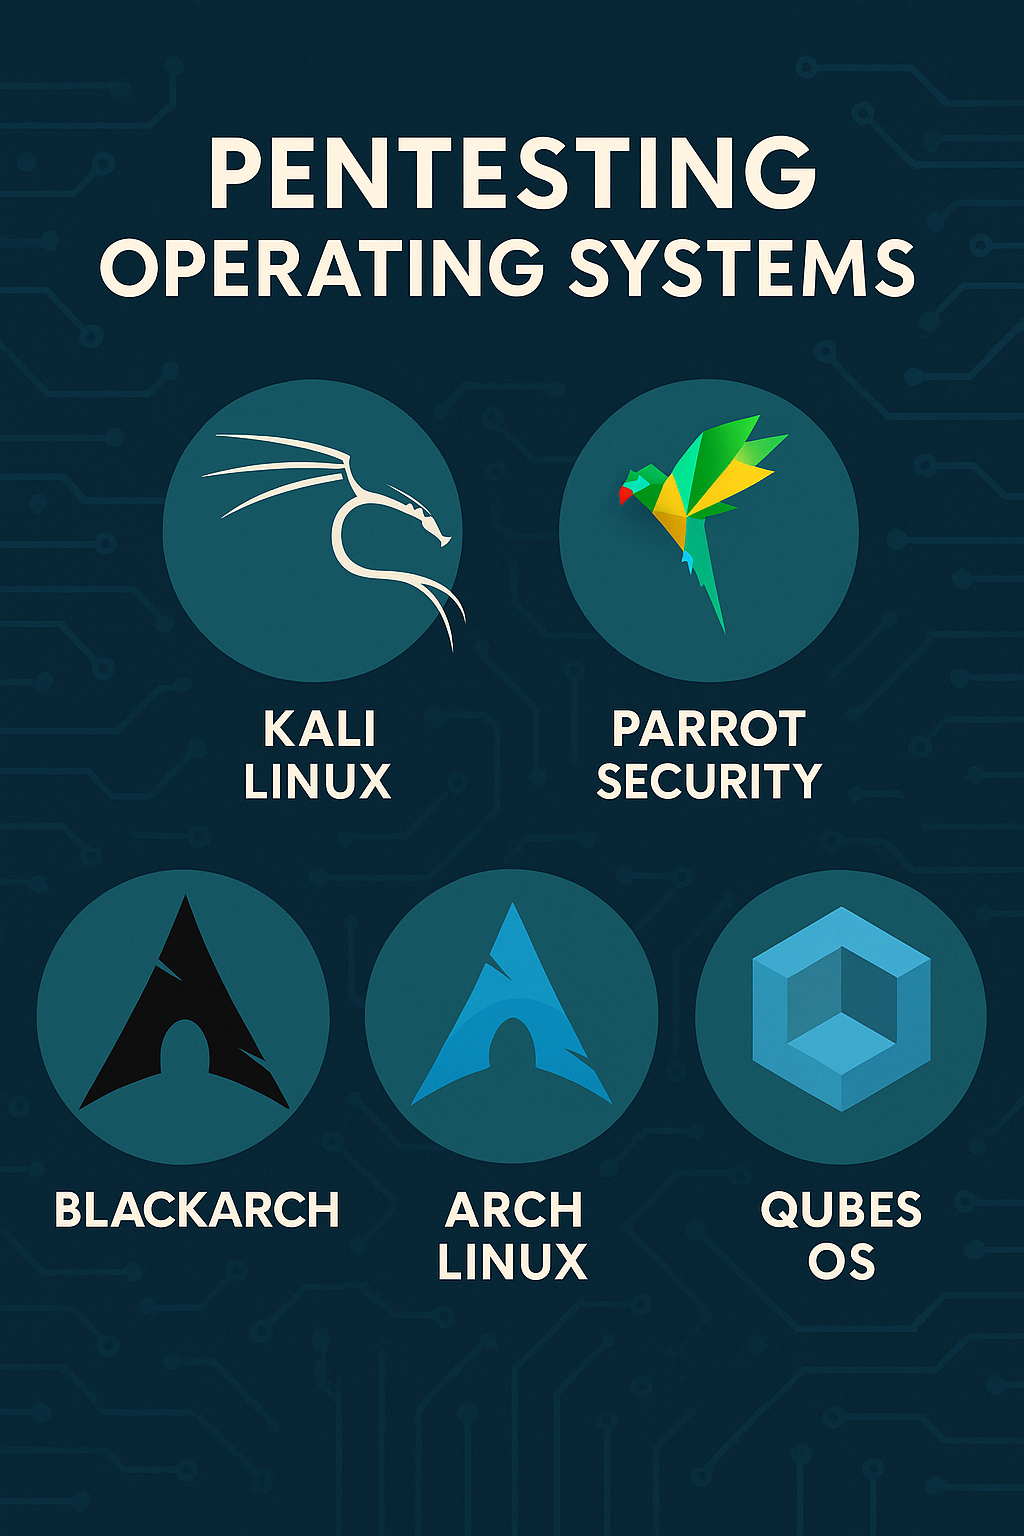
Exploring the Best Operating Systems for Pentesting & Security: Beyond Kali and Parrot
By Jull3Haxor | jull3.net
When it comes to penetration testing, red teaming, and security research, your choice of operating system is more than just personal preference—it shapes your daily workflow, the tools you have on hand, and even your security posture. While everyone knows about Kali Linux and Parrot OS, the landscape is much broader and more nuanced. In this article, I’ll break down popular, niche, and advanced options—plus share why I personally choose Arch with BlackArch tools for ultimate flexibility.
1. Kali Linux
What it is: The gold standard for many pentesters, Kali is based on Debian and comes preloaded with hundreds of security tools.
Pros:
Massive toolset out of the box—almost everything you need is preinstalled.
Huge community, lots of documentation and tutorials.
Available for ARM, Docker, VM, WSL, and even Android (Nethunter).
Frequent updates, maintained by Offensive Security.
Cons:
Can feel bloated if you only use a handful of tools.
Not ideal for daily-driver use (security first, convenience second).
Everyone uses it—malware often targets default Kali environments.
Best for: Fast deployment, learning, CTFs, labs, when you want “everything” ready.
2. Parrot Security OS
What it is: Debian-based, privacy-focused alternative to Kali, with additional features for forensics and anonymity.
Pros:
Lightweight compared to Kali; more privacy tools (Tor, Anonsurf, etc.).
Offers “Home” edition for regular use and “Security” edition for pentesting.
Sandbox support, secure browser options.
Active community and attractive UI (MATE by default).
Cons:
Slightly smaller tool selection than Kali, but most popular tools included.
Can be buggy after big updates.
Best for: Those who value anonymity, privacy, and want a lighter pentesting distro.
3. BlackArch
What it is: An Arch Linux-based penetration testing distribution/repo with 2,800+ tools.
Pros:
Ultra-flexible—use as a full distro or just add BlackArch repo to your existing Arch setup.
Rolling release model—always up-to-date.
Install only what you need (not a “kitchen sink” like Kali).
Hardcore minimalist design for those who like to customize.
Cons:
Steeper learning curve (it’s Arch!).
Fewer “hand-holding” scripts; expect to configure things yourself.
Not ideal for total beginners.
Best for: Advanced users who want granular control and minimal bloat.
4. Arch Linux (with BlackArch or custom tools)
What it is: Vanilla Arch Linux with just the tools you want (e.g., via BlackArch repo or manual install).
Pros:
Absolute minimalism—install only what you’ll actually use.
Samurai Web Testing Framework: Web app pentest distro.
Cyborg Hawk, Dracos Linux, Network Security Toolkit, RedHawk, Matriux: Specialized/experimental, often for CTFs, learning or specific domains.
Rolling vs. Fixed Releases
Rolling (Arch, BlackArch, Parrot, etc.): Always up-to-date, but potentially less stable. Great for latest tools and kernel features.
Fixed (Kali, Ubuntu-based, Fedora Security): More predictable, tested environments. Good for enterprise or when stability is critical.
Personal Workflow: Arch + BlackArch Tools + Proxmox
Personally, I run Arch Linux as my daily driver and pull in only the tools I actually use (from the BlackArch repo or the AUR). This gives me a lean, blazing-fast system—no bloat, just exactly what I need. If I ever require the “full Kali/Parrot experience” (for example, when tackling a CTF box or running a full red team engagement), I simply SSH into my Proxmox server and spin up a dedicated VM with Kali or Parrot. This setup lets me sandbox my activities, test exploits safely, and avoid polluting my main environment with tools or configs I rarely touch.
Why this workflow rocks:
Ultimate flexibility: My host system stays clean, minimal, and stable.
On-demand power: I get access to the full toolset when needed—without having to dual boot or clutter my laptop.
Safe testing: Anything risky stays isolated on its own VM, snapshot-ready.
Resource efficiency: My main system isn’t running hundreds of pentest tools I’ll never use.
Choosing the Right Distro: What Matters Most
Experience level: New to pentesting? Kali or Parrot gets you started quick. Power user? Build your own from Arch or Gentoo.
Preferred tools and workflow: Do you want everything out-of-the-box, or do you prefer building your own toolkit?
Stability vs. bleeding edge: Need latest exploits or rock-solid reliability?
Hardware support: Some distros (Qubes, Pentoo) are pickier about hardware.
Anonymity/forensics needs: Some are better for red teaming, others for forensics, blue teaming, or OSINT.
Summary Table
Distro
Base
Use Case
Pros
Cons
Kali Linux
Debian
Pentest, CTF
Huge toolset, docs
Bloated, targeted, not daily
Parrot Security
Debian
Privacy, Pentest
Lighter, privacy tools
Fewer tools, bugs
BlackArch
Arch
Custom, Power user
Modular, latest tools
Arch learning curve
Arch + BlackArch
Arch
Custom daily driver
Minimal, blazing fast
Setup/time investment
BackBox
Ubuntu
Lightweight pentest
XFCE, familiar, stable
Smaller, less active
Pentoo
Gentoo
Advanced, live use
Hardened, optimized
Gentoo curve, fewer tools
Fedora Sec Spin
Fedora
RedHat ecosystem
Secure, modern
Fewer tools, small community
CAINE, REMnux, etc.
Varies
Forensics/Malware
Specialized
Niche only
Qubes OS
Fedora
Isolation, research
Compartmentalization
Resource heavy, tricky HW
Windows + WSL
Windows
Hybrid workflow
Win+Linux together
Not pure, limited tools
Final Thoughts
There’s no “one size fits all” in the world of pentesting OSes. Kali is not the only way—and for many, it’s not even the best. Try a few, experiment with minimalism, and don’t be afraid to build a workflow that fits your needs, not the marketing hype.
What’s your favorite setup? Want to know more about BlackArch, Proxmox labs, or building your own security toolkit? Drop a comment or connect at jull3.net or Facebook!